
DIY Photo Booth Props: Tips and Tricks for Memorable Photos


Creating your own DIY photo booth props can be a fun and cost-effective way to add a personal touch to any event. Whether it's a wedding, birthday party, or corporate gathering, these props can make your photo booth experience more engaging and memorable.
Getting Started with DIY Photo Booth Props
First, gather your materials. You’ll need basic supplies like cardstock, scissors, glue, and wooden dowels. You can find printable templates online or design your own using software like Adobe Illustrator or Canva. Consider themes that match your event, whether it’s vintage, modern, or themed around a specific holiday.
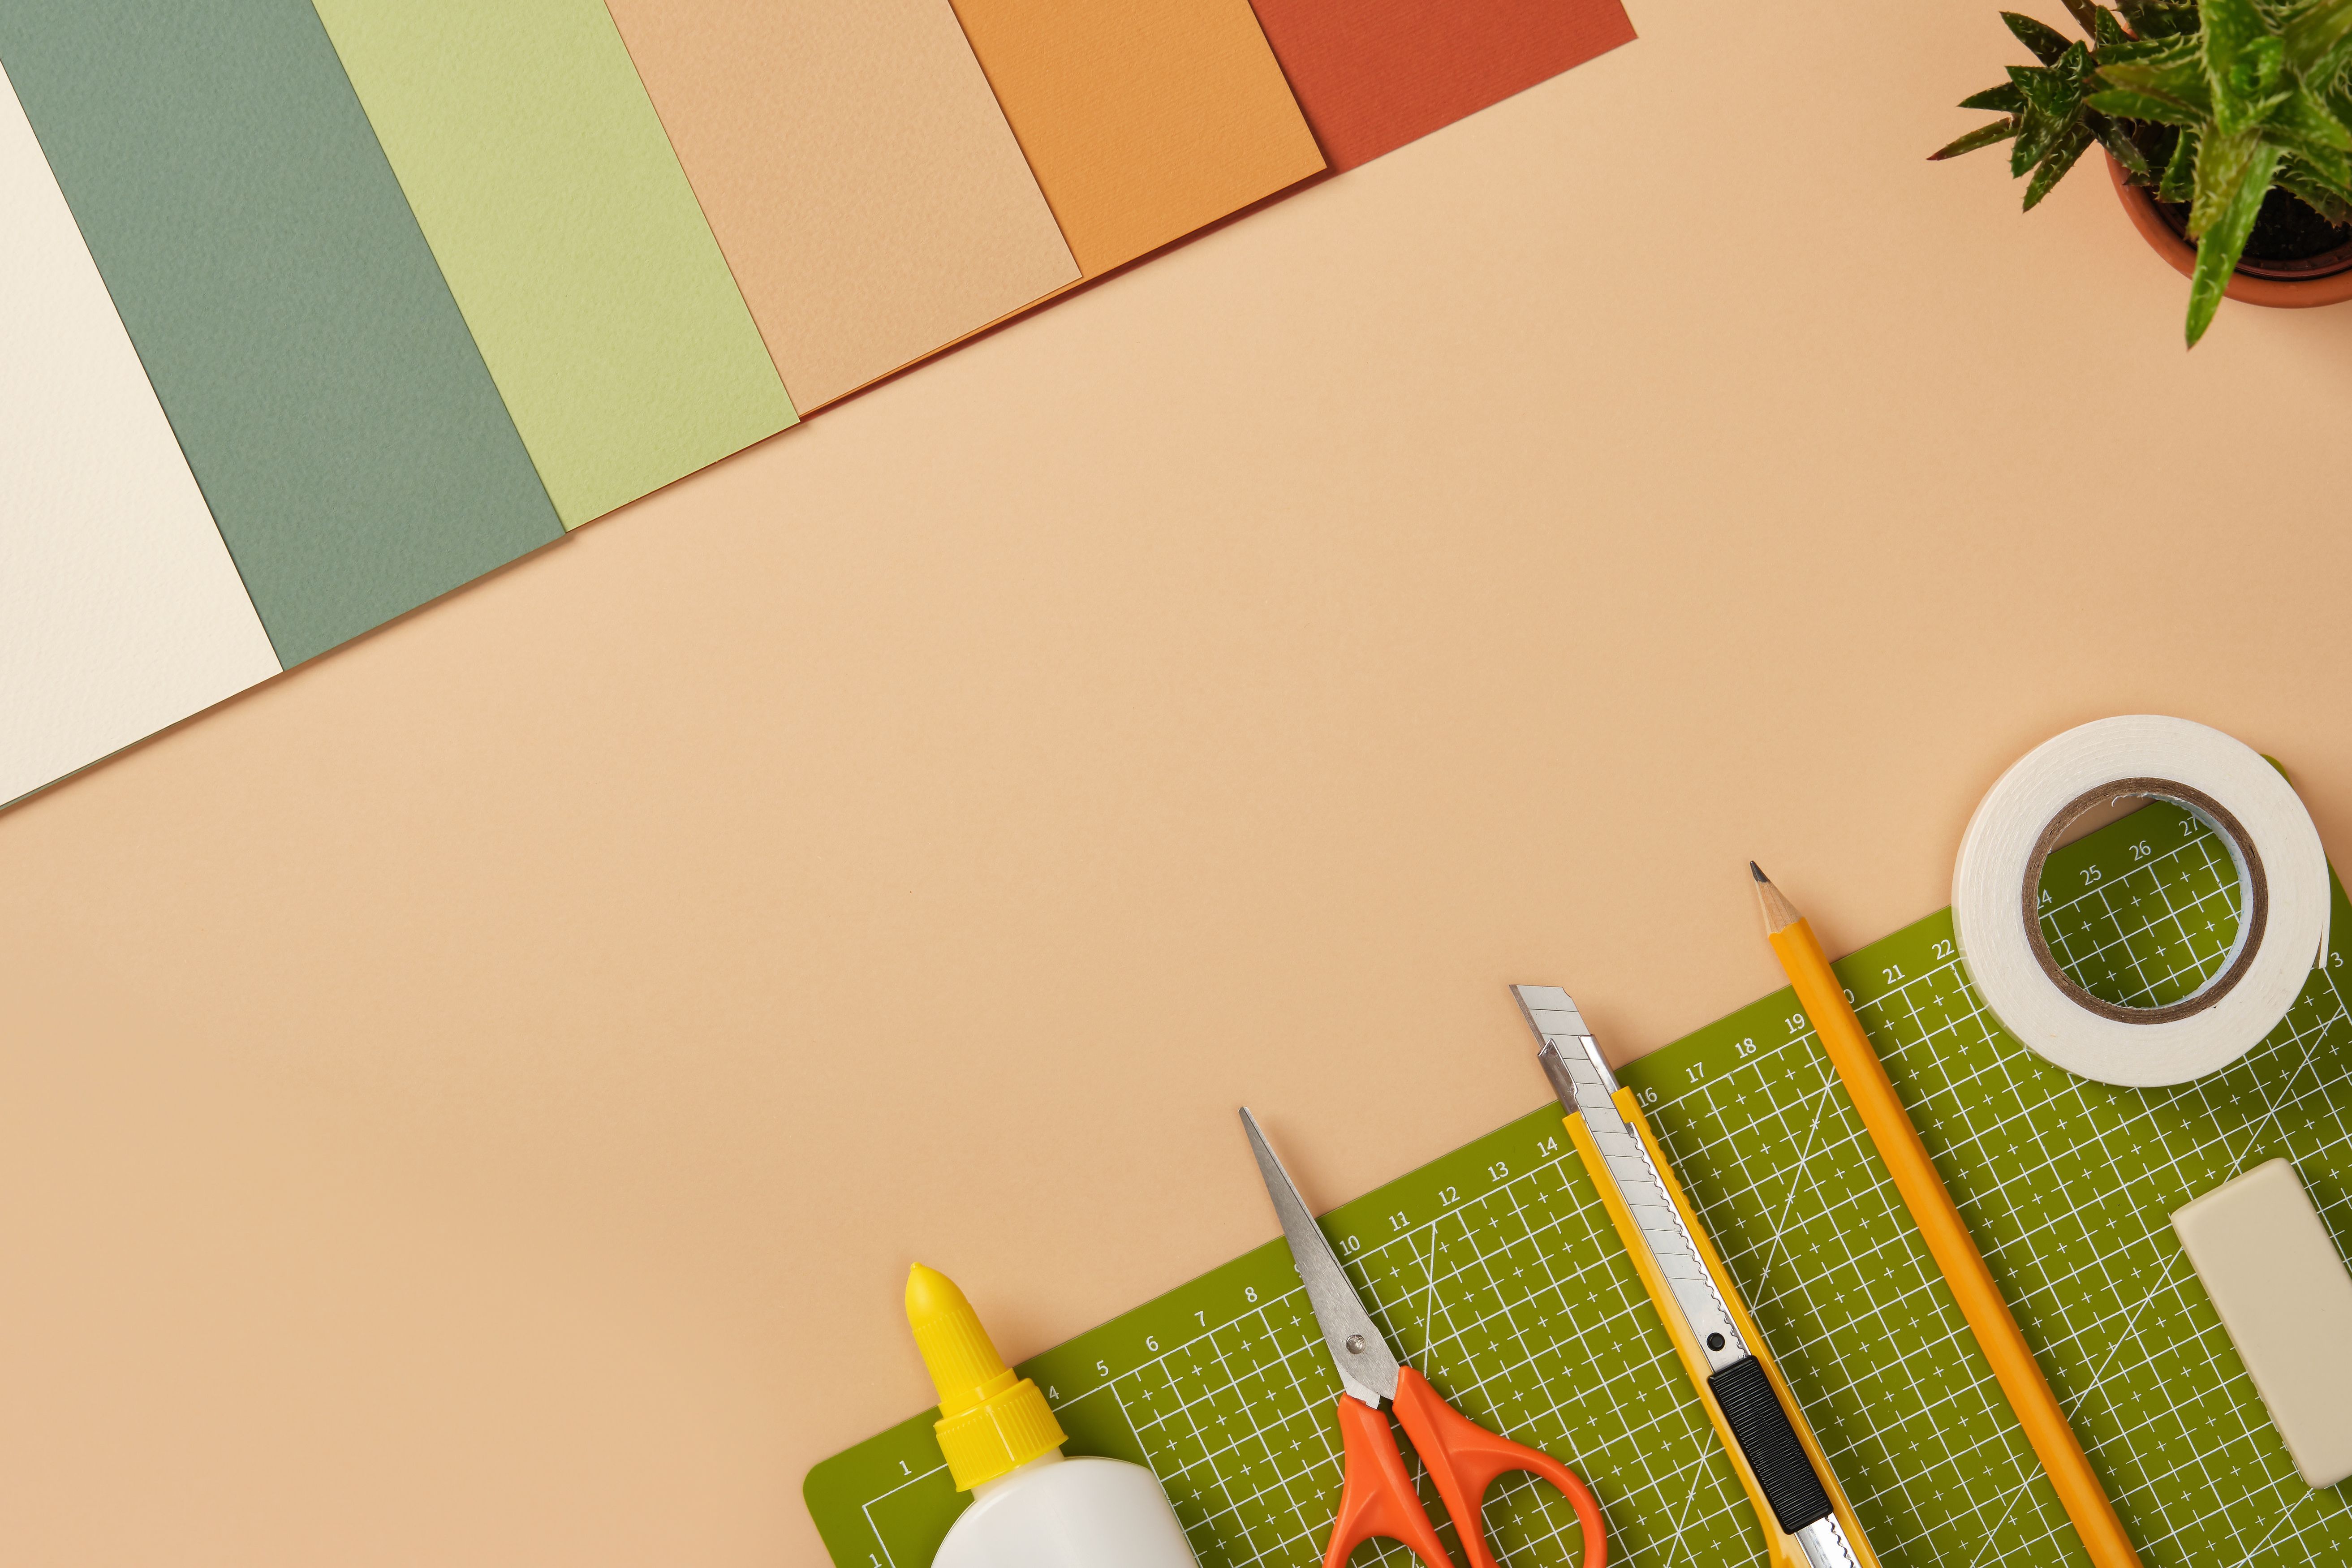
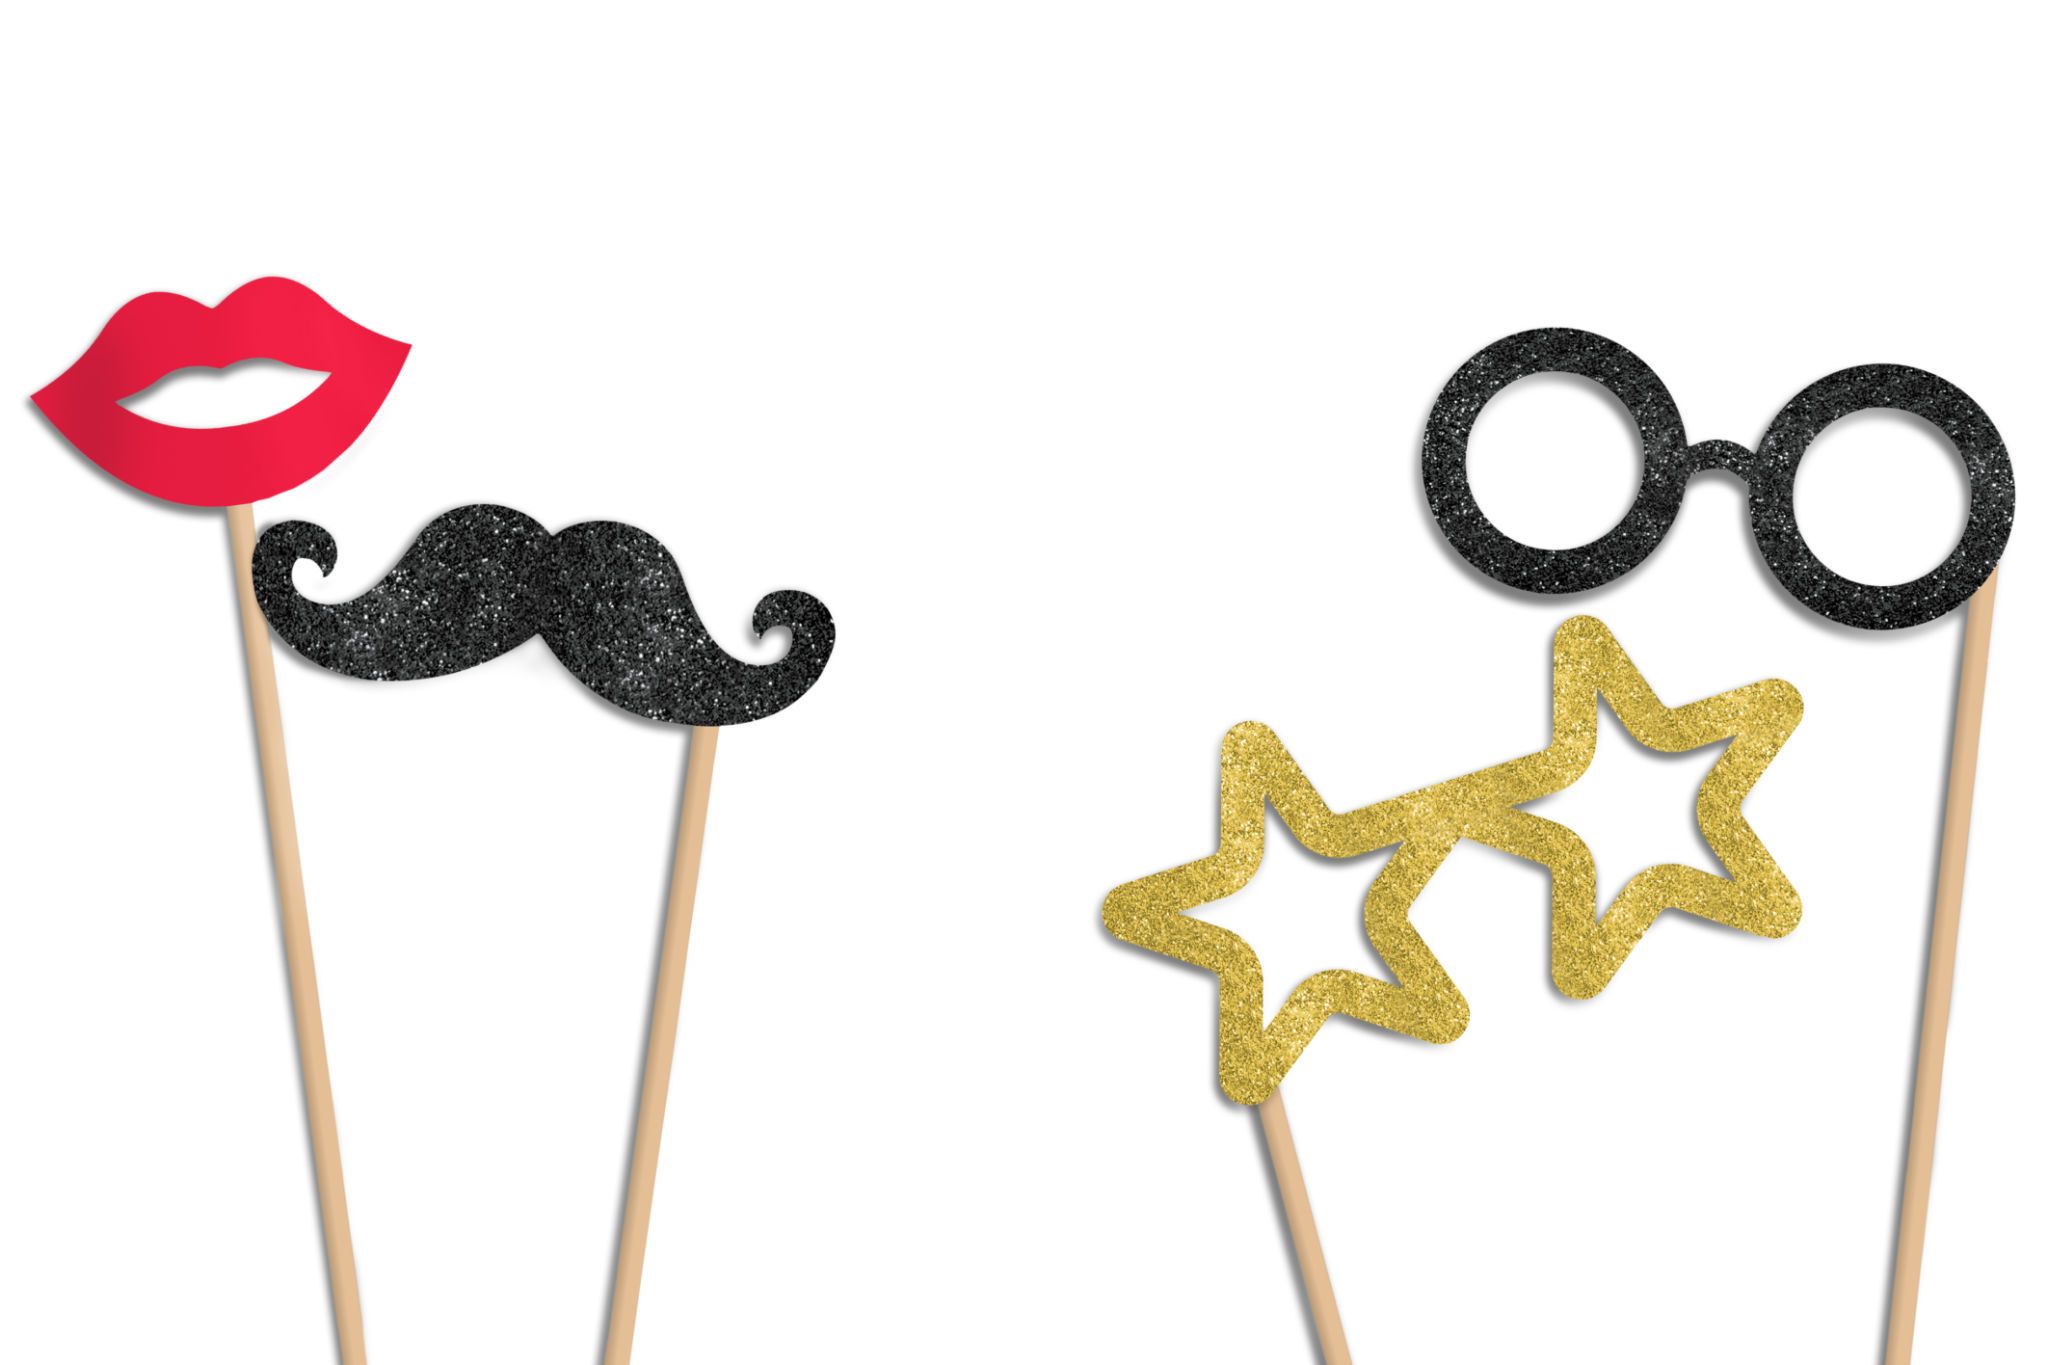
Once you have your materials, use your creativity to cut out shapes like mustaches, glasses, and hats. These classic props are always a hit and easy to make. For a more personalized touch, consider adding speech bubbles with funny sayings or event-specific messages.
Adding Color and Texture
To make your props stand out, incorporate a variety of colors and textures. Use glitter paper for a sparkling effect, or add feathers and ribbons for a playful touch. Mixing different materials will give your props a professional appearance and make them more appealing in photos.
Paint pens and markers can also be used to add details and patterns. Don’t shy away from bold colors; they will help your props pop against the photo booth backdrop.
Tips for Sturdy Props
While creativity is key, ensuring your props are sturdy is equally important. Use strong adhesive like hot glue to attach the wooden dowels to your props. This will keep them from falling apart during the event. Reinforce delicate areas with extra layers of cardstock to prevent bending.
If you’re planning a long event, consider laminating your props for extra durability. This will protect them from spills and wear, allowing you to reuse them for future events.
Organizing and Displaying Your Props
Once your props are ready, display them in an organized and accessible way. Use baskets or decorative boxes to keep everything tidy. Label sections by theme or type, making it easy for guests to find what they’re looking for.
Consider setting up a mirror near the props station, so guests can see how they look before snapping a photo. This encourages interaction and ensures everyone looks their best in the pictures.
Encouraging Guest Participation
To get your guests involved, include a few instructions or sample poses. A small sign with prompts can inspire creativity and lead to more dynamic photos. Encourage guests to mix and match props for added fun.
Remember, the goal is to create an enjoyable experience. With these tips and tricks, your DIY photo booth props will be a hit, leaving everyone with memorable photos and lasting impressions.